
Your roof is your home’s first line of defense against the elements, shielding you from rain, snow, wind, and UV rays. Over time, exposure to these elements can take a toll on your roof, leading to deterioration, leaks, and costly repairs. Fortunately, with the right approach and materials, you can extend the lifespan of your roof and enhance its performance through DIY roof coating. In this comprehensive guide, we’ll explore the benefits of roof coating, the different types of coatings available, and step-by-step instructions for applying a protective coating to your roof. By taking proactive measures to protect your roof, you can safeguard your home and save money on future repairs.
Benefits of Roof Coating
Roof coating offers numerous benefits for homeowners looking to enhance the durability and longevity of their roofs. One of the primary advantages of roof coating is its ability to provide an additional layer of protection against the elements. Coatings act as a barrier, preventing water penetration, UV damage, and thermal expansion, which can cause cracks and deterioration over time. Additionally, roof coatings can help improve energy efficiency by reflecting sunlight and reducing heat absorption, resulting in lower cooling costs during hot summer months.
Moreover, roof coatings can extend the lifespan of your roof by sealing cracks, reinforcing seams, and preventing moisture intrusion. By addressing small issues before they escalate into larger problems, roof coating can help prolong the need for costly roof replacement. Furthermore, roof coatings are available in a variety of colors and finishes, allowing you to customize the appearance of your roof while enhancing its performance and protection.
Types of Roof Coatings
When it comes to DIY roof coating, there are several types of coatings to choose from, each offering unique properties and benefits. Acrylic roof coatings are popular due to their versatility, durability, and ease of application. These coatings form a seamless membrane that resists water penetration and UV damage while providing excellent adhesion to various roofing materials. Silicone roof coatings offer superior weather resistance and UV protection, making them ideal for areas with extreme weather conditions or intense sunlight.
Another option is asphalt emulsion coatings, which are affordable and easy to apply, making them suitable for budget-conscious homeowners. These coatings provide a protective barrier against moisture and can extend the lifespan of asphalt-based roofing materials. Additionally, elastomeric roof coatings offer flexibility and crack resistance, making them ideal for areas prone to temperature fluctuations and thermal expansion. By understanding the characteristics of each type of coating, you can select the right product for your specific roofing needs.
Assessing Your Roof’s Condition
Before applying a roof coating, it’s essential to assess the condition of your roof and address any underlying issues that may affect the coating’s performance. Start by inspecting the roof for signs of damage, such as cracks, leaks, or missing shingles. Repair any damaged areas and replace missing or broken shingles to ensure a smooth and stable surface for the coating.
Next, clean the roof surface thoroughly to remove dirt, debris, and algae growth that can interfere with adhesion. Use a pressure washer or a solution of water and detergent to scrub the roof surface and rinse away any remaining residue. Allow the roof to dry completely before proceeding with the coating application. Additionally, trim back any overhanging branches or vegetation that could obstruct the coating process or contribute to moisture buildup on the roof.
Gathering the Necessary Supplies
Before you begin the roof coating process, gather all the necessary supplies and equipment to ensure a smooth and efficient application. Depending on the type of coating you choose, you may need a variety of tools, including a paint roller, brush, or sprayer for application. Additionally, you’ll need safety equipment such as gloves, goggles, and a respirator to protect yourself from fumes and chemicals.
In addition to application tools, be sure to have the appropriate roof coating product for your specific roofing material and needs. Read the manufacturer’s instructions carefully and follow any recommended preparation or application guidelines. If you’re unsure which product to use or how much you’ll need, consult with a roofing professional or home improvement store representative for guidance. By having all the necessary supplies on hand before you begin, you can streamline the coating process and achieve professional-quality results.
Preparing the Roof Surface
Proper preparation is key to ensuring the success and longevity of your roof coating application. Start by inspecting the roof surface for any signs of damage or deterioration, such as cracks, holes, or rust spots. Repair any damaged areas using appropriate roofing materials and sealants to create a smooth and uniform surface for the coating.
Next, clean the roof surface thoroughly to remove dirt, dust, and debris that could interfere with adhesion. Use a pressure washer or a solution of water and detergent to scrub the roof surface and rinse away any remaining residue. Pay special attention to areas prone to algae or mold growth, as these can affect the coating’s performance if not properly addressed.
After cleaning, allow the roof surface to dry completely before applying the coating. Avoid coating the roof in wet or humid conditions, as this can prevent proper adhesion and curing of the product. If necessary, use fans or allow extra drying time to ensure the roof surface is completely dry before proceeding with the coating application.
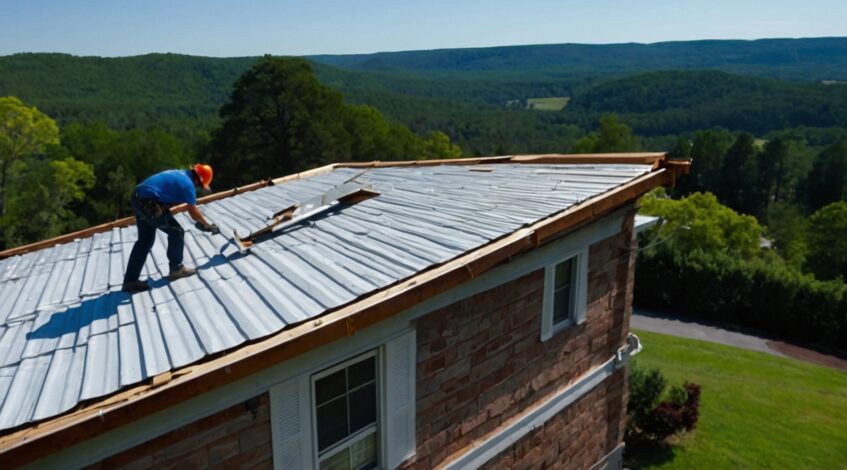
Applying the Roof Coating
Once the roof surface is clean and dry, it’s time to apply the roof coating according to the manufacturer’s instructions. Start by mixing the coating product thoroughly to ensure uniform consistency and proper adhesion. Use a paint roller, brush, or sprayer to apply the coating evenly to the roof surface, working from one end of the roof to the other in smooth, overlapping strokes.
Pay close attention to seams, edges, and other areas prone to leaks or water infiltration, ensuring thorough coverage and a watertight seal. Apply multiple coats of the coating as needed to achieve the desired thickness and protection level, allowing each coat to dry completely before applying the next. Be sure to work in small sections to maintain control and avoid uneven application or pooling of the coating.
After applying the final coat, allow the roof coating to cure according to the manufacturer’s instructions before exposing it to foot traffic or inclement weather. Typically, roof coatings require several hours to dry completely, but curing times may vary depending on temperature, humidity, and other environmental factors. Once cured, the roof coating will provide a durable and protective barrier against the elements, extending the lifespan of your roof and enhancing its performance.
Maintaining Your Coated Roof
To ensure long-lasting protection and performance, it’s important to maintain your coated roof regularly. Conduct periodic inspections to check for signs of damage, wear, or degradation, such as cracks, peeling, or discoloration. Repair any damaged areas promptly using compatible roof coating products to prevent water infiltration and further deterioration.
Additionally, keep the roof surface clean and free of debris to prevent mold, algae, and other organic growth from compromising the coating’s integrity. Use a gentle detergent or specialized roof cleaner and a soft-bristle brush to remove dirt, stains, and biological growth without damaging the coating. Avoid using harsh chemicals or abrasive cleaning tools that could strip away the coating or cause surface damage.
Furthermore, trim back overhanging branches and vegetation to prevent debris buildup on the roof and minimize the risk of damage from falling branches or limbs. Inspect gutters and downspouts regularly to ensure proper drainage and prevent water from accumulating on the roof surface. By maintaining your coated roof and addressing any issues promptly, you can maximize its lifespan and protect your home from costly repairs.
Cost Considerations and Savings
When considering DIY roof coating, it’s essential to weigh the upfront costs against the long-term savings and benefits. While the initial investment in materials and equipment may seem daunting, the cost of professional roof coating services can be significantly higher. By tackling the project yourself, you can save money on labor costs and achieve professional-quality results with proper planning and execution.
Additionally, DIY roof coating can help extend the lifespan of your roof and reduce the need for costly repairs or premature replacement. By applying a protective coating to your roof, you can prevent water intrusion, UV damage, and thermal expansion, which can lead to leaks, cracks, and other issues over time. Furthermore, roof coatings can improve energy efficiency by reflecting sunlight and reducing heat absorption, resulting in lower cooling costs and increased comfort indoors.
When calculating the cost of DIY roof coating, consider factors such as the size and slope of your roof, the type of coating product you choose, and any additional supplies or equipment needed for the project. Compare prices from different suppliers and manufacturers to find the best value for your budget. Additionally, factor in the potential savings and benefits of DIY roof coating, such as reduced energy costs, increased property value, and extended roof lifespan, to determine the overall return on investment.
Environmental Considerations and Sustainability
As homeowners increasingly prioritize environmental sustainability, it’s essential to consider the environmental impact of DIY roof coating products and practices. Many roof coating products contain volatile organic compounds (VOCs) and other harmful chemicals that can contribute to air and water pollution, as well as indoor air quality issues. When selecting a roof coating product, look for low-VOC or zero-VOC options that are safer for the environment and human health.
Additionally, choose roof coating products that are manufactured using sustainable and eco-friendly practices, such as recycled materials or renewable resources. By opting for environmentally responsible products, you can reduce your carbon footprint and minimize the impact of your home improvement projects on the planet. Furthermore, consider the long-term durability and performance of roof coating products to minimize the need for frequent reapplication and waste generation.
When applying roof coating, take steps to minimize environmental contamination and runoff by following best practices for storage, handling, and disposal of coating materials. Avoid over-application or spills that could contaminate soil, waterways, or wildlife habitats, and clean up any accidental spills or drips promptly using absorbent materials. By taking a proactive approach to environmental stewardship, you can enjoy the benefits of DIY roof coating while minimizing your impact on the planet.
Final Thoughts
DIY roof coating offers homeowners a cost-effective and sustainable solution for protecting their roofs from the elements and extending their lifespan. By choosing the right coating product, properly preparing the roof surface, and following best practices for application and maintenance, you can achieve professional-quality results and enjoy long-lasting protection for your home. Whether you’re looking to repair existing damage, enhance energy efficiency, or simply prolong the life of your roof, DIY roof coating is a practical and rewarding home improvement project.
Remember to prioritize safety at all times by wearing appropriate protective gear and following manufacturer’s instructions and guidelines. Take your time during the preparation and application process to ensure thorough coverage and proper adhesion of the coating. Additionally, conduct regular inspections and maintenance to address any issues promptly and maximize the lifespan of your coated roof.
With the right tools, materials, and techniques, DIY roof coating can be a rewarding and satisfying home improvement project that pays dividends for years to come. By taking proactive measures to protect your roof from the elements, you can safeguard your home and enjoy peace of mind knowing that your investment is well-protected against the effects of weathering and aging. So why wait? Get started on your DIY roof coating project today and give your roof the protection it deserves.